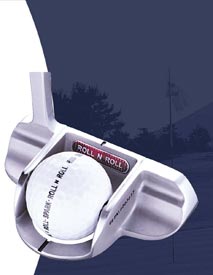
What is the Roll n Roll Putter?

  • The Roll n Roll putter is a skill teaching putter that trains the player to putt with the lowest possible back and down swing.
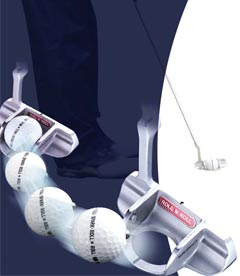
  • The ball attached to the putter head will only roll straight back and forth.
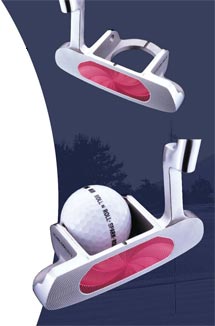
  • If the putter is raised too early, the attached ball will stop rolling.
  • If the broken line on the middle of the ball stops rotating, the player immediately knows the putter has been lifted off the ground.
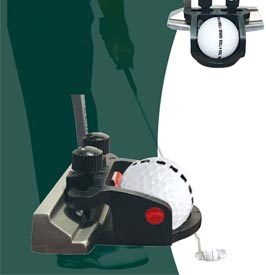
*The attached ball is removable.(Spring rod axle is embedded in the ball)
*When practicing, attach the ball.
*When playing, push the ball up using your fingers and the ball will pop out easily.
*Does not conform with USGA rules with ball in place. Please remove before playing.

ORDER Yours Today
Click HERE


ORDER Yours Today
Click HERE


Step 1:   Roll the attached ball with the putter in one hand. Follow the line straight back and forth. Then switch to the other hand and use the same routine.
Step 2:   Feel the left and right shoulder, elbow, and hand movements.
Step 3:   You should experience the same feel with both hands while rolling the ball back and forth.
Step 4:   Hold the grip and feel the grip pressure.(If the grip pressure is too tight or too loose, the ball will not roll straight.)
Step 5:   Hold the grip and feel the grip pressure.(If the grip pressure is too tight or too loose, the ball will not roll straight.)
Step 6:   Find the impact zone (square the putter face) with the ball position when you setup.
Step 7:   Find the hand grip. The putter should always be at the original set-up position in the impact zone on the down swing.
Step 8:   If you use a wrist break, the ball will not roll straight.
Step 9:   When you swing the putter, feel the push and pull motion. You must let the ball roll a minimum of 3" from the original setup position on your backswing. Your downswing must be at least 1" past your original setup position.
Step 10:   If the line in the middle of the ball does not move at some point in your swing, it indicates that the putter has been lifted from the ground.

 After steps 1 thru 10, you will feel the following:
  1. Shoulder action - right & left
  2. Elbow movement - right & left
  3. Hand movement & position - right & left
  4. Grip pressure
  5. Ball position when you setup
  6. Lowest possible backswing & follow through
  7. How to square the putter face with the impact zone
  8. Easily adjustable distance control
 Distance Control
  • Using the same length backswing and downswing, and a consistent swing will help learn distance control.

    For example, on an "average green"
    Using a 2" backswing and a 2" downswing should give you about a 4 ft range.
    Using a 4" backswing and a 4" downswing should give you about an 8 ft range.
    Determine how far to increase the backswing length and increase the downswing the same way

ORDER Yours Today
Click HERE

ORDER Yours Today
Click HERE

 
 Attachable and Removable
Attachable to most putter heads to learn the same skill as the Roll n Roll putter.

 To Get Started
Training with the Roll n Roll Jr. is easy. Simply align with the center of you putter, use the screws to gently attach it and you're ready to get the ball rolling!
Before play, the Roll n Roll Jr. easily detaches allowing an improved game through practicing with your own putter. Watch your putting improve after only a few uses!

 Follow Through
Do not purposely try to follow through. It would be like hitting the ball with your hand instead of a swing. When you swing the putter using the 10 steps above you will automatically have a natural follow through.

 Fast Downhill Putts
With regular practice using the Roll n Roll putter, you will understand golf ball top spins when you stroke the ball.
For fast downhill putts, as soon as the stroke contacts the ball, it is very important to stop the putter face completely (no follow through). This will help stop top spins on the ball.